Map visuals to a surface
Fit the final output to a screen, triangle, corner or multi-surface setup.
Why use it
Shape one composition around the space you are projecting onto.
Do this
- 01Get a visual playing, choose External and move the output window onto your projector.
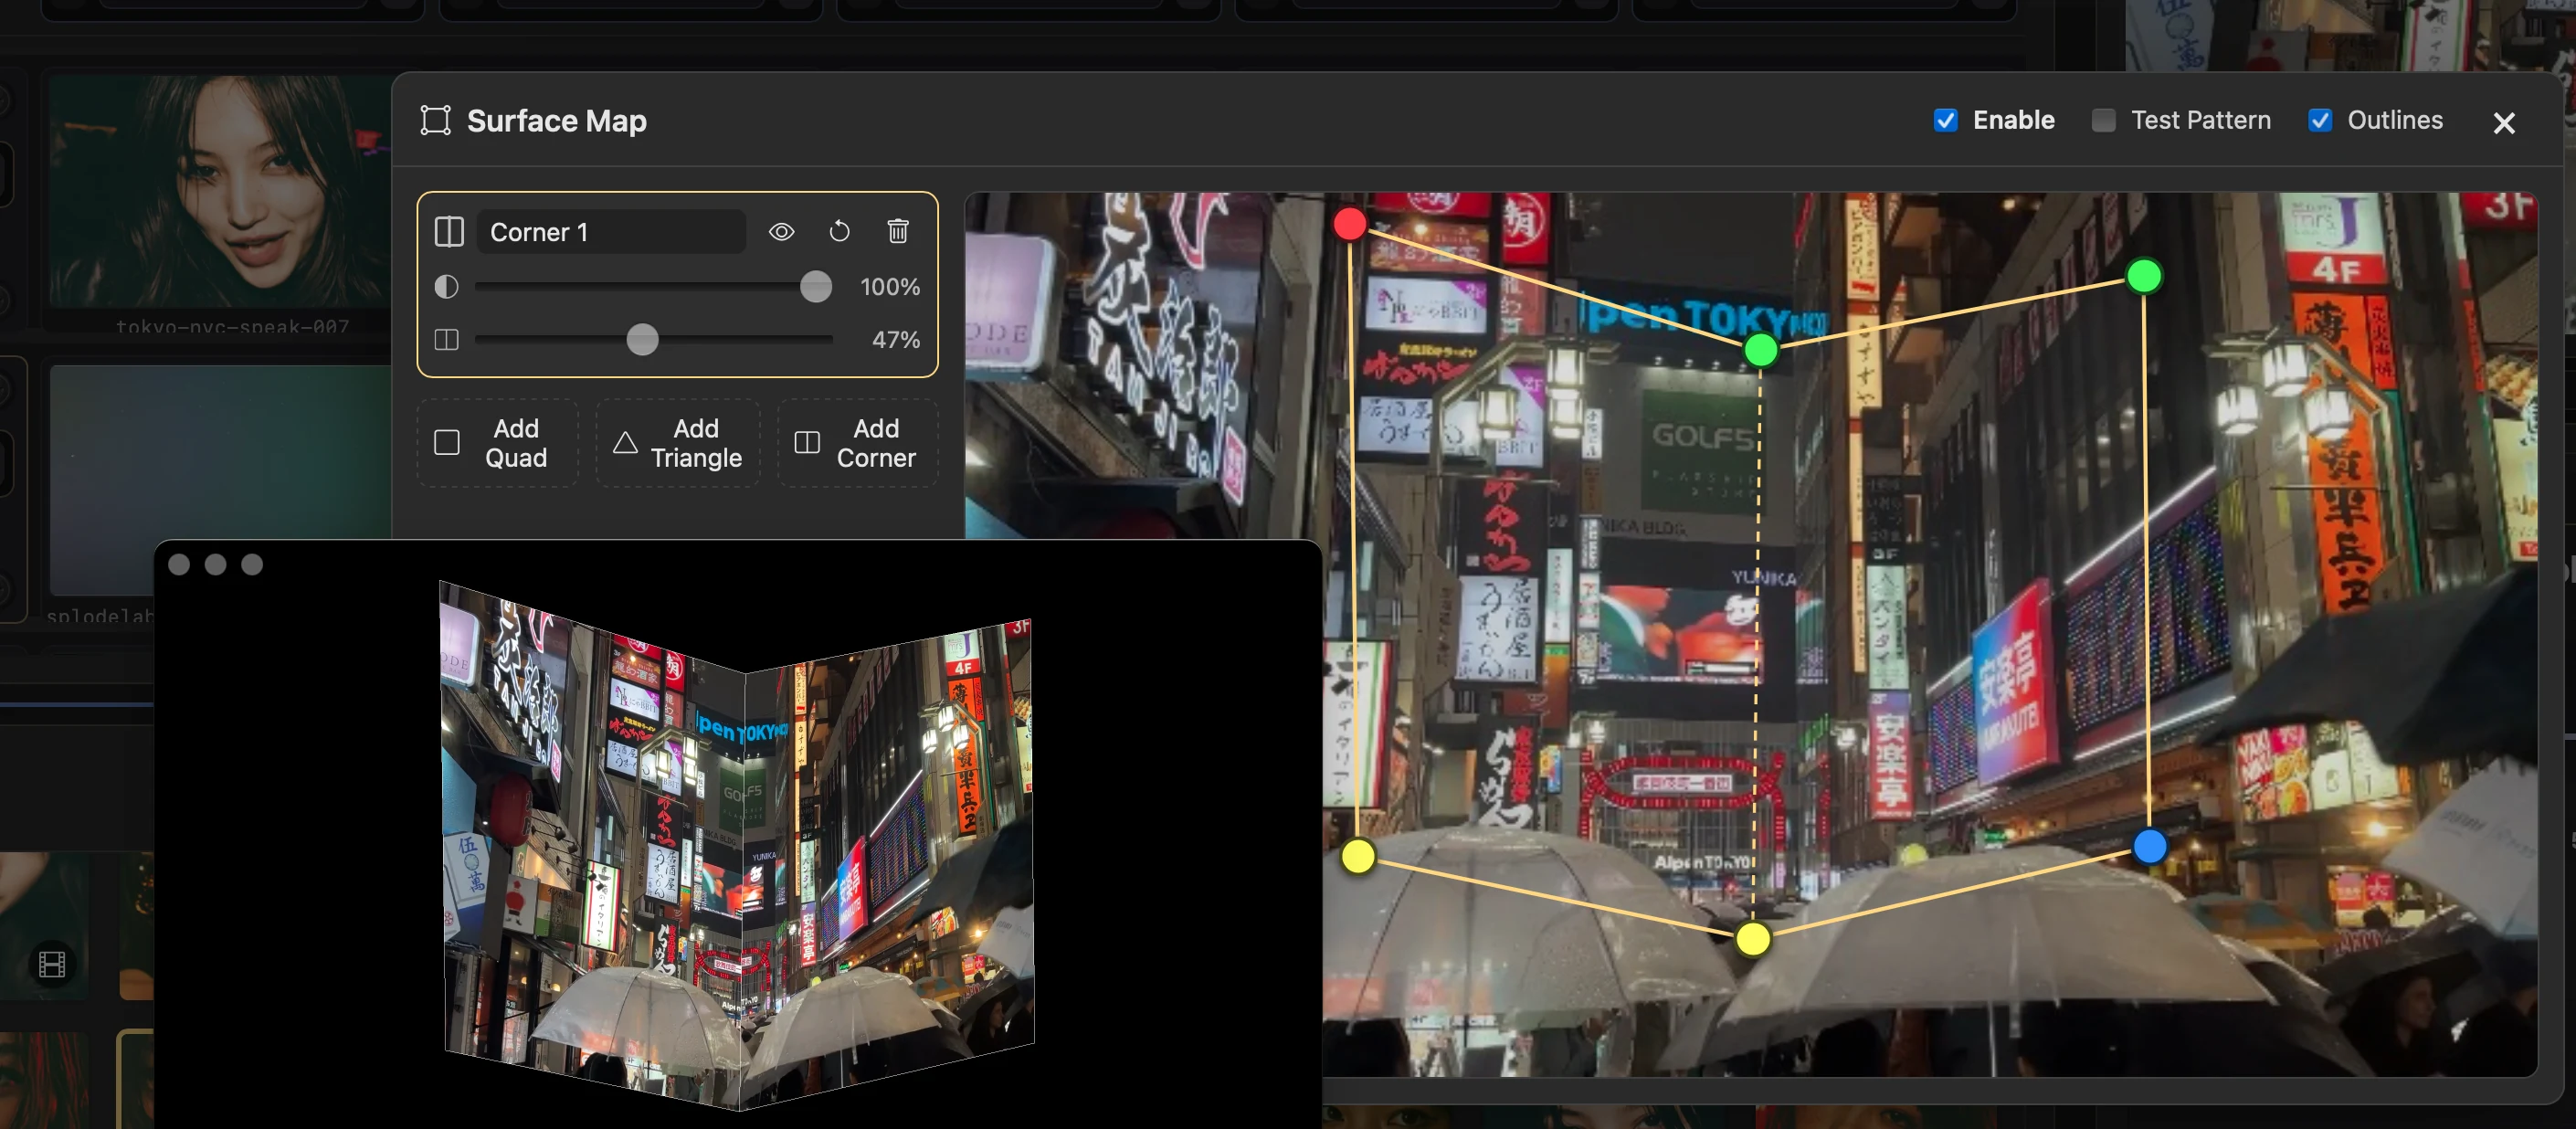
- 02Open Surface Map from the top toolbar, then choose Add Quad, Add Triangle or Add Corner. The first surface enables mapping.
- 03Turn on Test Pattern and Outlines. Drag the coloured points until the projected edges line up with the surface.
- 04Add and name more surfaces when needed. Use the eye to hide one, the first slider for opacity, and the second Corner slider to move the split between its two sides.
- 05Turn off Test Pattern and Outlines when everything lines up, then close Surface Map. The setup is saved with the project.